

Marketing Manager | Posted on | food-cooking
Mastering Food Vlogging: How to Create Mouthwatering Recipe Videos with CapCut
0
In recent years, food vlogging has exploded in popularity, with aspiring chefs and food enthusiasts sharing their culinary adventures on various social media platforms. One of the key ingredients to a successful food vlog is the creation of visually appealing and mouthwatering recipe videos. These videos not only showcase delicious dishes but also engage and inspire viewers to try their hand in the kitchen.
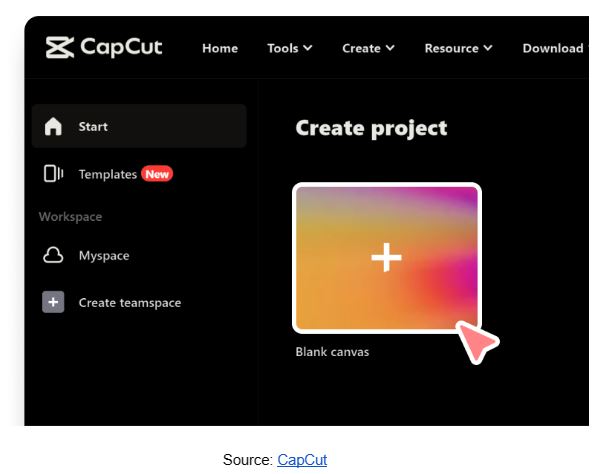
If you're looking to step up your food vlogging game, one powerful tool that can help you achieve professional-quality recipe videos is CapCut, a free web video editor onilne. In this article, we will provide you with a step-by-step guide on how to create captivating and drool-worthy recipe videos using CapCut.
Reasons Why CapCut is Your Go-To Editor for Recipe Videos
CapCut online video editor is suitable for creating recipe videos due to several reasons. Let’s discuss them below;
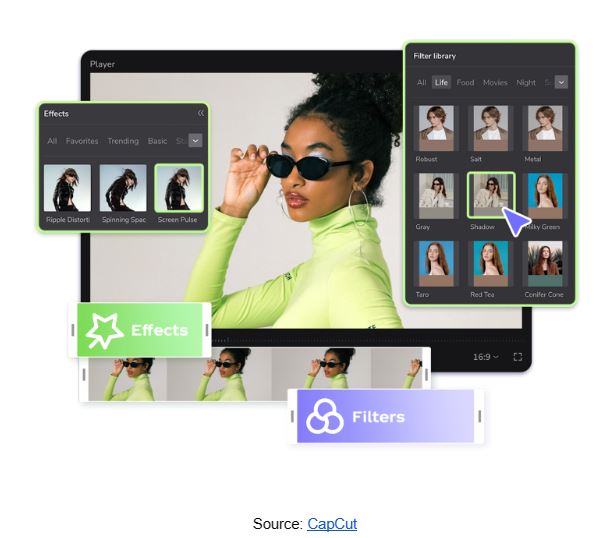
- Rich Editing Features: CapCut offers a wide range of editing features that are perfect for creating recipe videos. Users can trim and merge clips, add transitions between scenes, apply filters and effects to enhance the visual appeal, and even adjust the video speed to create engaging cooking tutorials.
- Text and Titles: With CapCut, you can add text and titles to your recipe videos, making it easier for viewers to follow along with the steps. Whether it's displaying ingredient lists, cooking instructions, or adding catchy titles to your video, CapCut provides versatile text editing options to suit your needs.
- Audio Editing: CapCut's audio editing capabilities allow you to add background music or voiceovers to your recipe videos. You can also adjust the volume levels and apply audio effects to create a professional and engaging audio experience.
- Overlay and Stickers: CapCut offers a wide variety of overlays and stickers that can be used to add visual elements to your recipe videos. You can use overlays to display timers, ingredient labels, or even animations that showcase the cooking process step by step.
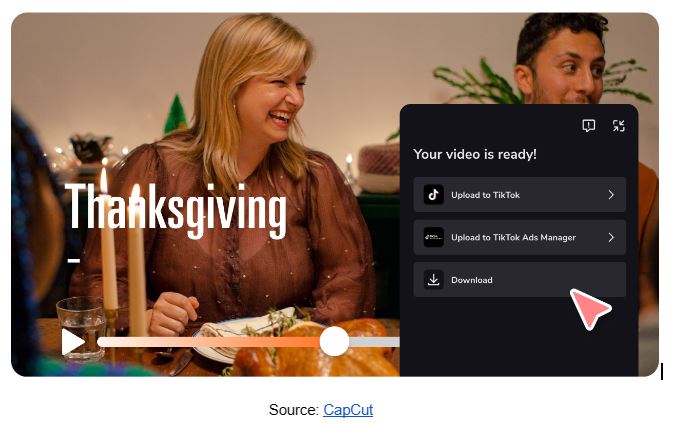
- Easy Video Export: Once you've finished editing your recipe video, CapCut allows you to easily export your video in different formats and resolutions. This flexibility ensures that your videos can be shared across various platforms, including social media, websites, or even professional presentations.
- Social Sharing Integration: CapCut provides seamless integration with popular social media platforms, making it effortless to share your recipe videos with your audience. You can directly export your videos to platforms like YouTube, Instagram, or TikTok, allowing you to reach a wider audience and gain exposure for your culinary creations.
Step-by-Step Guide for Creating Mouthwatering Recipe Videos with CapCut
Step 1: Gather Your Ingredients
Before you dive into the process of creating your recipe video, make sure you have all the necessary ingredients and equipment ready. This includes your chosen recipe, fresh ingredients, cooking utensils, and a camera or smartphone with CapCut installed. Planning ahead will ensure a smooth and efficient video creation process.
Step 2: Set Up Your Filming Area
Creating an aesthetically pleasing backdrop for your recipe video is crucial. Choose a well-lit area in your kitchen or another suitable location. Consider natural lighting sources and position your setup accordingly. Clear any clutter and create an appealing and organized space that allows your ingredients and cooking process to take center stage.
Step 3: Film Your Ingredients
Begin by capturing visually striking shots of your ingredients. Showcasing fresh produce, vibrant spices, and other elements of your recipe can help build anticipation and engage your viewers. Experiment with different angles and close-up shots to highlight the texture and colors of the ingredients. Use CapCut's video editing features to add smooth transitions between shots and enhance the overall visual appeal.
Step 4: Document the Cooking Process
Now it's time to capture the cooking process itself. Position your camera or smartphone in a stable location, such as a tripod, to ensure steady footage. Start by filming the initial steps of the recipe, such as chopping vegetables or preheating the oven. As you progress, focus on the techniques, movements, and stages of cooking that make your recipe unique and intriguing. Remember to keep the video engaging by using various camera angles, close-ups, and interesting transitions.
Step 5: Add Text Overlays and Graphics
CapCut offers a wide range of text overlay options and graphics that can enhance your recipe videos. Consider adding titles to introduce each step of the recipe or highlight key ingredients. You can also include cooking tips, measurements, or other relevant information using text overlays. Experiment with different fonts, colors, and sizes to find a style that aligns with your brand and makes the information easily readable.
Step 6: Incorporate Captivating Music
Music can play a significant role in setting the mood and enhancing the overall appeal of your recipe videos. CapCut provides a library of royalty-free music tracks that you can choose from or import your own audio files. Select music that complements the style and ambiance of your recipe. For example, upbeat tracks can add energy to a fast-paced cooking process, while soothing melodies can create a relaxing atmosphere for slow-cooked dishes.
Step 7: Utilize CapCut's Editing Tools
CapCut offers a variety of editing tools that can help elevate your recipe videos to the next level. Experiment with the trimming tool to remove any unnecessary footage and keep the video concise. Adjust the brightness, contrast, and saturation to enhance the visual appeal of your shots. You can also apply filters or adjust the color temperature to achieve a specific aesthetic. Additionally, consider incorporating slow-motion or time-lapse effects to add visual interest and create a dynamic viewing experience. Use the video bg remover to adjust your video’s background.
Step 8: Finalize and Export Your Video
Once you are satisfied with the editing and overall flow of your recipe video, it's time to finalize and export the video. Take a final look at the video to ensure everything is in place and meets your desired standards. CapCut allows you to export videos in various formats and resolutions, so choose the one that best suits your intended platform and audience. Consider optimizing the video for different social media platforms by adjusting the aspect ratio and dimensions accordingly.
Conclusion
Creating mouthwatering recipe videos with CapCut is an excellent way to enhance your food vlogging content and captivate your audience. Remember to plan ahead, set up a visually pleasing filming area, and take advantage of CapCut's editing features to add text overlays, graphics, captivating music, and other effects.
With practice and creativity, you can produce drool-worthy recipe videos that will leave your viewers hungry for more. So grab your ingredients, fire up CapCut, and start creating culinary masterpieces that will make your food vlog stand out from the crowd.